Professional Product Photography Tips and Tricks Revealed
October 29, 2019“лучшие Онлайн-казино В россии Лучшие Российские Сайты Казино 202
December 6, 2022
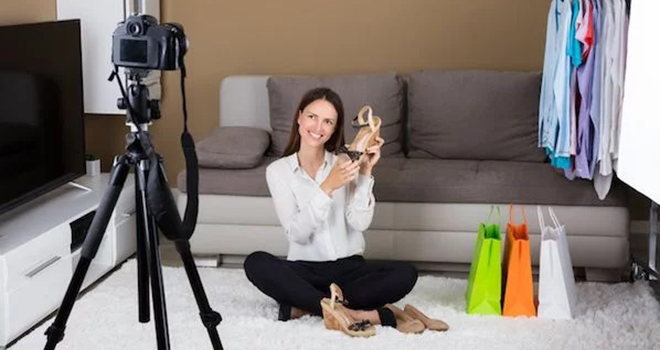
Selling products online is the latest trend these days. You can sell anything online because people find it very hard to go out and shop so online shopping has gone to a new level. Once when you are done with all the nits and grits of the photography, it’s the time to edit the images before uploading them on online portal. With all the basic gears and equipment in photo studio, there are times when you lose control and have to edit the images in post processing phase. Making the images attractive and gorgeous is the primary responsibility of every online business owner.
However, to make the images absolutely perfect, some things are required even if you have clicked the pictures with complete perfection. When you create your own online website, it is important for you to put special emphasis on the images. Product images can make or break your website so make sure they look appealing and tempting to the viewers’ eyes. No one wants to see a bad product image and even if the website has best design, it will push the viewers away. Because it is hard to edit each image individually, here are few steps you can follow to do edit the images in bulk. Let us edit the pictures and get flawless results:
Software – Photoshop and Lightroom
To edit the images, you definitely need Photoshop or Lightroom as they are the best photo editing software available across the world. Companies from all over the world use Photoshop and Lightroom to retouch the images so if you are planning to go with image editing, get your hands on these software. At first, it may feel a little challenging to understand how Photoshop works because it is jam-packed with tons of features, filters, and tools. To get an idea of how the tools are used, you need a lot of time as Photoshop is never ending software.
But today our main focus is photo editing so we will talk about how to edit the images in this wonderful software. If you are using it for the first time, you can take trial plan to save your money from the paid membership. To start with, trial would be ok as you don’t know whether or not you will able to use it in the longer run. When you use Photoshop, you will get to know the keyboard shortcuts as well which will make the process smoother and faster.
RAW correction
Open the images you want to edit in Photoshop RAW. Here, you need to open all the images in one go and the effects you apply on one picture will be the same for every other picture. First of all, we will retouch the images to make them look perfect in every sense.
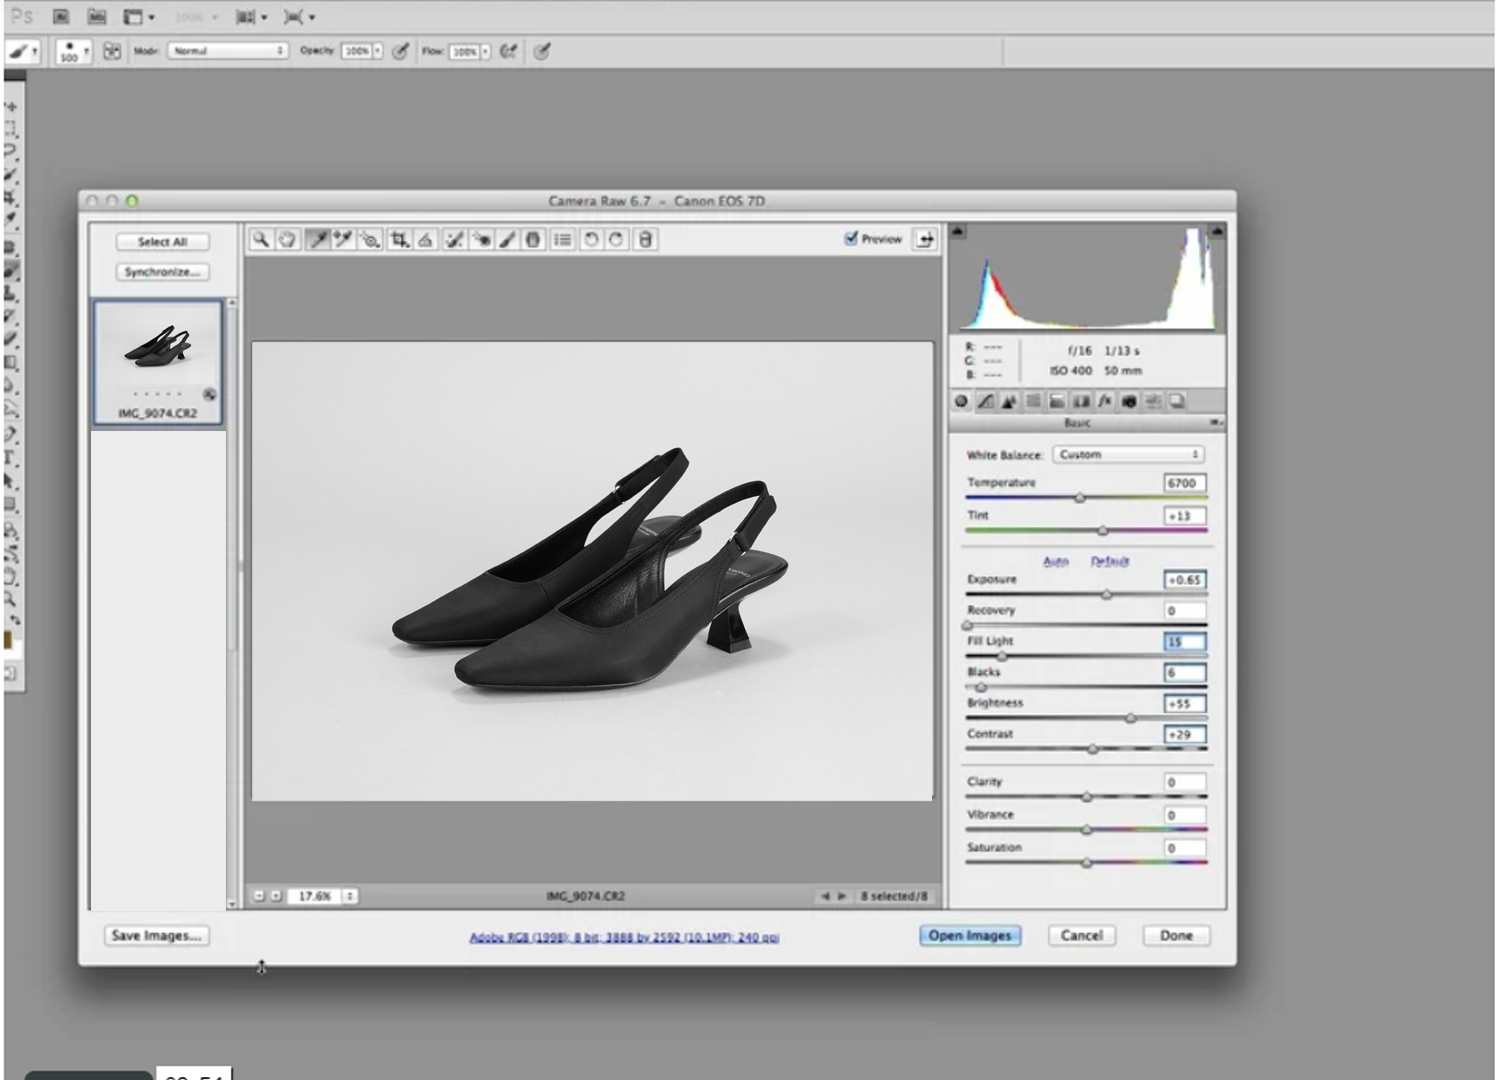
- Now if you see the colors are not even and there is a bad tint, fix that by using white balance eye dropper tool.
- Next, when you do that, you will see the image in blue tone and now it’s the time to switch on to white color background. Click on it and it will change the color
- Get your hands on the exposure tool to brighten the image. The same effect will go for all the other opened images.
- To improve the brightness, contrast or sharpness of the images, pick brightness tool and make the changes according to what you feel right
- While making the changes, don’t forget to see the preview pane as it displays all the changes you are making.
- Once you are done, save the images in JPEG format
- It would be better if you save all the images in the same folder to stay organized.
Spot retouching
Next comes, spot retouching tool in Photoshop. This is a fun tool as you can work on the spots in the images. For that, open the image in Photoshop from which you want to remove the spots. Create a duplicate layer by pressing Ctrl+J and you will see two layers of the same image. It is important to create a duplicate layer because if you make any changes, the original layer will not be affected. When you zoom in the picture, you will see some dirt or dust which is not visible to the naked eye but it is there in the photo which needs to be removed before uploading it on the website.
- Go to the tools palette and pick patch tool to remove the tiny dust particles from the image
- See the picture and draw a circle around the area you want to edit. Next, move the selected area to the area you want the retouched area to look like. When you do this, the previous area will be replaced with this newly selected area
- Go to the brush selection to remove the scratches from the image. Get your hands on the soft feather brush and adjust the size according to the area you want to retouch. It is always good to zoom in the picture as it gives clear view of even the minute details.
- Start dragging on the problem area until you get the results
- If you want to make the image look lighter or darker, dodge tool and burn tool comes in use respectively.
Now move to color adjustment of the image, here:
Color Adjustment
Photoshop offers quick color adjustments to make the products look naturally good. Create curves layer to start with and because this is a little tricky part, you have to be very careful. Color adjustment helps in producing appealing images and can be done in the post production phase.
As you can see, the curve layer has three colors i.e. white, grey and black. The top of the curve changes white color, the bottom works on black and the middle affects the greys. Now it is up to you to decide which tone you need to edit and then slide the curve accordingly. For more color adjustment, use Hue/Saturation.
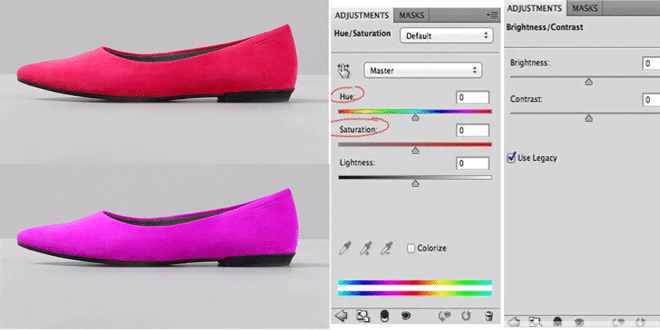
Here, you can change the complete color of the image. Like suppose you own a shoe store, with this option you are able to change the color from green to purple or any other that you want. Vibrancy limit can also be controlled with hue/saturation.
When you want to change the color of the product, go to Hue in the adjustment layer. Move the slider until you get the desired color and if the vibrancy feels too much, go to Saturation and move the slider to the left in order to control the vibrancy or vice versa.
Now, it is possible that you don’t want to change a particular area so for that purpose, tick mark on legacy option in the layer to mask the area you don’t want to change. Keep on tweaking the colors and vibrancy values to get the desired results. Yes, it is fun to play around with different options in Photoshop as you get to learn so many things.
Making File and Alignment
Since every ecommerce or online portal has its own guidelines, you should know yours. Before uploading the pictures, make sure they are of appropriate size so the website doesn’t take too long to load. Yes, it happens when the images are heavy, the website takes time to load which push the viewers away. The file shouldn’t be heavy but large to offer the best view to the visitors. People get attracted towards well sought-out images and not the small ones as they want to see each and every tiny detail of the image. Here’s how to align the images:
- Open a new document from File>New
- Set the resolution to 72 dpi and the pixel value as you want. The background color must be white
- Name the file whatever you like
- Click Ok when all the settings are done. Now you will see a window with rulers which you have to adjust so the product stays within the boundaries of the rulers. It is important to keep the product organized. Drag the product you want to resize in this window and according to the rulers, adjust the size.
- Go to Select>Refine edge after selecting the product and smooth the edges of the background.
- Now you have to create a mask of the selection. For that, click on the button as shown in the picture. You will see that the mask will automatically attach to the retouched layer and then click “/” to see if the mask is right. Click “/” to exit the mask and the product will sit on the white background.
Add Shadow and Save
Last but not least, in this step, you have to add shadow to the product image to make it pop out from the background. As you may know, shadows lend natural finish to the pictures, they also make them look deep and realistic. Plus, the shadows lure the viewers and grab their attention immediately. Sometimes, you get a picture with natural shadow when you are clicking near a window or a reflective surface which adds depth to the overall image.
Save the file in JPEG format once you are done with all the retouching and editing. Not only JPEG format, but save the PSD files as well if in case you want to edit the images in future as well. You don’t have to do it all over again if the PSD files are there.