When customers visit on your e-commerce store, their top priority is product image. Even, 93% of shoppers depend on visuals to guide their purchasing decisions. Product photography isn’t just about snapping pretty pictures. It’s also your brand’s silent salesperson.
Commercial product photography takes this a step further. It’s not just about aesthetics. It’s about crafting images that sell. Whether you’re a small business owner or a budding photographer, getting this skill can transform how your audience perceives your products.
In this guide, we’ll show you how to do product photography like a pro. You can start with just a smartphone and a DIY setup. Ready to make your products look amazing? Let’s Explore.
What Is Product Photography?
Product photography goes beyond simply capturing images of items. It focuses on crafting visuals that inspire people to desire those products. As visual storytelling. Every angle, shadow, and detail highlights what makes your product special. Product photography captures high-quality images. These images are used to sell, market, or document items. This applies whether you’re showcasing a luxury watch or jewelry.
However, all product photos aren’t created equal. Here’s a quick breakdown of the three main types you’ll encounter:
- E-commerce Photography
- Clean, crisp shots on a plain white background (like Amazon listings) that put the product front and center.
- 360-degree spins, zoomable details, and flat lays. In e-commerce images, remove distractions from images to ensure shoppers can focus solely on the product.
- Lifestyle Photography
- Products showcased in everyday settings. Picture a steaming coffee mug resting on a warm kitchen counter or hiking boots navigating through dirty trails.
- This approach allows customers to envision themselves using the product, offering a glance into their future experience.
- Creative Product Photography
Creative photography often adds extra elements to enhance the image’s mood or message. This can mean using slow shutter speeds for motion blur, playing with reflections, or applying post-processing to emphasize details.
Why Product Photography Is Important
- Impact on Sales: Studies show that products with high-quality images see a 30%+ boost in conversion rates. Why? Because humans are visual creatures—Clear photos eliminate doubt and address unasked questions.
- Building Trust: Low-quality or amateur photos can make a startup appear untrustworthy. High-quality images show professionalism. For example, Nordstrom saw a 40% drop in returns after switching to studio-quality photos. Customers felt more confident in their purchases.
- Standing Out: In a crowded market, unique visuals are your heart. Their minimalist makeup product photos became synonymous with their brand identity, helping them dominate beauty shelves.
High-quality product photography is essential, not optional. Whether you’re working with a large e-commerce platform or a small local shop, compelling images can transform casual visitors into dedicated customers. The good news? You don’t need a big budget to achieve stunning results.
How to Do Product Photography: A Step-by-Step Guide
Have a product to photograph but feel stuck? Don’t stress. You don’t need a fancy studio or a photography degree to get great shots. Whether it’s handmade jewelry for Etsy or tech gadgets for Amazon, this guide will help you take professional-quality photos, even as a beginner.
Step 1: Plan Your Shoot
Before you even touch your camera, ask yourself:
- What’s the goal? Are these photos for Instagram, Amazon, or a brand catalog? Each platform has its own style. For example, Amazon needs clear white backgrounds, but Instagram prefers moody lifestyle shots.
- What’s your shot list? Prioritize these angles:
- Hero shot front-and-center.
- Side/profile view.
- Close-ups of textures, logos, or unique features.
- Lifestyle or in-use shots, e.g., someone wearing the necklace, not just lying flat.
Step 2: Gather Your Equipment
You don’t need a $2,000 camera setup to start. Here’s the lowdown:
- Camera: A DSLR or mirrorless camera is ideal, but modern smartphones like iPhones or Galaxies work surprisingly well. just use Pro mode if available.
- Tripod: Non-negotiable for avoiding blur. Even a $20 Amazon basics tripod does the trick.
- Lighting: Soft, diffused light is key. Use:
- Natural light: Shoot near a window on a cloudy day.
- Budget artificial light: Clip-on LED lamps or a DIY foam board reflector.
- Backdrops: White poster board for e-commerce or textured fabric for lifestyle shots.
- Extras: Toothpicks to prop up small items, double-sided tape, or a spray bottle
Step 3: Set Up Your Studio
Transform your dining table or spare room into a shoot-ready space:
- Lighting hacks:
- Avoid harsh shadows by placing lights at a 45-degree angle to the product.
- Use a white bedsheet over a window to diffuse sunlight.
- Backdrop tips:
- For white backgrounds, tape the poster board to a wall and curve it under the product to avoid shadows.
- For texture, drape a wrinkled linen cloth or use a fake wood board.
- Styling:
- Clean fingerprints/dust off products using microfiber cloths.
- Use a sticky tack or small stands to keep items upright.
Step 4: Shoot Like a Pro
Here’s how to get sharp, consistent shots:
- Camera settings:
- Aperture: Use f/8 to f/11 for sharpness across the product.
- ISO: Keep it low (100–400) to avoid grain.
- Shutter speed: 1/100 or faster to prevent motion blur.
- Composition rules:
- Rule of thirds: Place the product off-center for visual interest.
- Negative space: Leave room around the product for text or cropping.
- Consistency: Keep the same distance and angle for all hero shots.
- Detail shots: Get closer. Highlight stitching on a bag, the gloss of lipstick, or the grip on a tool.
Step 5: Edit and Optimize for the Web
Editing is where good photos become great:
- Basic editing:
- Adjust exposure and contrast.
- Crop to standard sizes based on your requirements.
- Use free tools like Canva, Snapseed, or Adobe Lightroom Mobile, or Adobe Photoshop.
- Background removal: Tools like Remove.bg (free), help create those clean white-background shots e-commerce loves. But to get more precious details, you must use adobe photoshop or work with any background removal service provider.
You don’t need to master everything at once. Begin with one product, experiment with lighting, and refine your style. Even big brands like Warby Parker started with simple setups.
Tips for Cohesive Product Photography
Have you ever seen an Instagram feed where one photo is dark and moody, the next is bright and colorful, and the third looks like it was taken in a closet? It can be quite jarring. Consistent product photography is more than just a visual choice; it creates a recognizable style that customers can easily associate with your brand. Here’s how to achieve that:
1. Make Consistency in the photograph
When you scroll to the Apple website, you must see that every image feels like it belongs to the same universe: clean, minimalist, and polished. That’s the power of consistency.
- Angles: Stick to the same perspective for similar products. If you shoot mugs from a 45-degree overhead angle, do it for all mugs.
- Lighting: Use the same light setup (warm vs. cool tones) across shoots. If using natural light, take test shots in the same spot daily.
- Editing Style: use the same editing prospect for the same type of product image.
2. Tell a Story
Lifestyle photography isn’t just about showing a product—it’s about selling a vision. Ask yourself: What does your ideal customer crave? Adventure? Comfort? Status?
- Aspiration over inventory: Don’t just show a coffee maker. Show it steaming in a sunlit kitchen with a handwritten recipe book nearby.
- Model diversity: Use real people your audience can relate to. For example, a fitness brand might feature athletes of all body types, not just influencers.
- Props with purpose: A hiking boot photo gains depth with mud-splattered socks and a trail map in the background.
3. Speed Matters
Did you know 53% of mobile users leave sites that take longer than 3 seconds to load? Gorgeous photos mean nothing if they’re slowing your site to a crawl.
- Compress: Use free tools like TinyPNG or Squoosh to shrink file sizes without sacrificing quality.
- Format wisely: Use JPEGs for colorful images like lifestyle shots and PNGs for transparent backgrounds.
- Lazy loading: Enable this feature on your site so images load only as users scroll.
Cohesive photography focuses on intention rather than perfection. Begin with a single product line, implement these tips, and grow from there.
Common Mistakes to Avoid
In product photography, mistakes happen. Even small errors can hurt sales and damage credibility. They can also make your brand look unprofessional. Here’s a helpful guide to common pitfalls and tips to avoid them like a pro.
1. Why Does My Product Look Like a Ghost… or a Shadow Monster?
The Mistake: Poor lighting. Overexposed images wash out details, while dim shots force customers to squint.
The Fix:
- Natural light hack: Shoot near a window indirect sunlight. Too harsh? Drape a sheer white curtain over it.
- Artificial light tip: Use two light sources—one at 45 degrees to the product, one as a fill light to soften shadows.
- Test shot: Check your camera screen for blinkies (flashing highlights) indicating overexposure.
2. Why Amazon Just Rejected My Photos
The Mistake: Ignoring platform-specific guidelines. Amazon demands pure white backgrounds for product cutouts. Etsy buyers love rustic textures. Ignore the rules, and your listings get buried or banned.
The Fix:
- Research first: Google [Platform Name] product photo guidelines.
- Prep variations: Shoot some products on white and textured backdrops for flexibility.
- Tool savior: Use free background removers like Remove.bg to meet e-commerce standards fast.
3. Why Is My Product Photos So Bright?
The Mistake: Over-editing. Saturated colors, heavy filters, or unrealistic retouching scream scam.
The Fix:
- Less is more: Adjust exposure and contrast, but keep colors true to life.
- Use a reference: Place the product next to your screen while editing to match real-life hues.
- Walk away: Edit, take a 10-minute break, then revisit with fresh eyes.
A study found that 62% of shoppers distrust product photos that look overly edited. So, Keep it real.
Tools and Resources
You don’t need a big budget to take stunning product photos. Whether you’re shooting handmade candles in your garage or prepping a commercial product photography campaign, these tools and resources will save you time, money, and sanity.
Gear that you want:
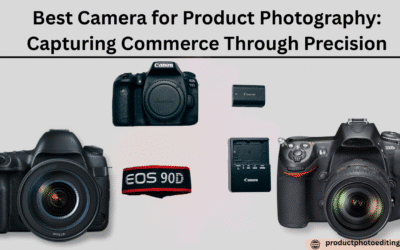
- Cameras:
- Entry-Level DSLR/Mirrorless: Canon EOS Rebel T7 or Sony a6000 (under $500, perfect for crisp detail).
- Smartphone Hacks: Newer iPhones/Android phones work wonders. Use gridlines for alignment and Portrait mode for blurry backgrounds.
- Lighting:
- Neewer LED Panels: Affordable, adjustable brightness (under $100).
- DIY Natural Light Studio: A $10 white poster board as a reflector + a north-facing window.
- Tripods: Amazon Basics 60 ($25) keeps shots steady.
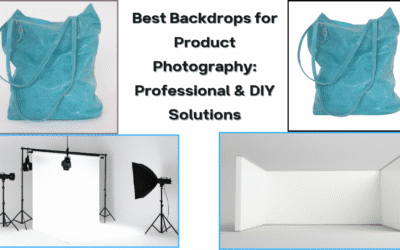
- Backdrops:
- E-commerce: White foam board ($5 at craft stores).
- Lifestyle: Thrifted fabrics (linen, denim) or marble-patterned vinyl (looks luxe, costs $15).
Editing Software:
You’ve taken the photos now make them pop:
- Free Options:
- Canva: Drag-and-drop magic for quick edits + social media templates.
- GIMP: free, open-source editing software. It’s like Adobe Photoshop in the use case.
- Snapseed: Mobile-friendly tweaks for exposure and color.
- Paid software:
- Adobe Lightroom: The gold standard for color grading and presets ($10/month).
- Photoshop: For advanced retouching (remove dust, fix reflections).
- Remove.bg: Instant background removal (free for basic use).
Learning Resources:
Many sites provide free courses and resources:
- YouTube Channels:
- Peter McKinnon: Edgy, entertaining tutorials on lighting and composition.
- Mango Street: Bite-sized lessons on storytelling through photos.
- Blogs:
- Shotkit: Gear reviews + shooting hacks.
- Creative Live: Free guides on commercial product photography.
- Courses:
- Skillshare: Product Photography at Home by Jan Gonzales (DIY setups).
- Udemy: Master Product Photography for Amazon/e-commerce sellers.
You don’t need all the tools—just the right ones. Grab your phone, a window, and a foam board. Experiment, make mistakes, and upgrade gear as you grow.
Conclusion:
In a world where a single photo can make or break a sale, Practice is most important in product photography. You’ve learned the what, the how, and even the what not to do. Now, it’s time to turn that knowledge into action.
You don’t need a studio or a pro camera to begin. Grab your smartphone, a sunlit window, and that thrifted bedsheet for a backdrop. Experiment with angles. Play with shadows. Mess up, laugh, and try again. Keep in mind Great product photography isn’t about having the fanciest tools. it’s about seeing your product through your customers’ eyes.
FAQs: About Product Photography
Can I Really Use a Smartphone for Product Photography?
Absolutely. Modern smartphones (iPhone 15, Samsung Galaxy S23, etc.) have cameras that rival DSLRs. Use these hacks to level up:
- Portrait Mode: Blurs the background for a pro look.
- Gridlines: Turn them on to nail the rule of thirds.
- Editing Apps: Snapseed or Lightroom Mobile fix exposure and colors. Pro Tip: Pair your phone with a $20 tripod to avoid shaky shots.
How Many Product Images Do I Actually Need?
Depends on where you’re selling:
- Amazon: 5–8 images (front, back, side, details, lifestyle).
- Instagram: 3–5 curated shots (mix of close-ups and in-context).
- Etsy: 4–7 images (show scale, materials, and handmade charm).
- Rule of Thumb: Cover every angle a customer would want to see IRL.
What’s the Best Backdrop Color for E-Commerce?
White—it’s the gold standard. Why?
- Removes distractions.
- Meets Amazon/eBay guidelines.
- Makes editing/background removal easier.
- But For lifestyle shots, try muted tones (beige, gray) or textures (wood, marble).
What Equipment Do I Need to Start?
The bare-bones starter kit:
- Camera: Smartphone or entry-level DSLR (Canon Rebel).
- Tripod: Steady shots = sharper images.
- Lighting: A sunny window + white poster board as a reflector.
- Backdrop: White foam board or textured fabric. Total Cost: Under $50 if you DIY.
How Do I Avoid Harsh Shadows and Glare?
Lighting hacks you could master:
- Diffuse It: Tape parchment paper over a lamp or use a sheer curtain on windows.
- Angle It: Place lights at 45 degrees to the product (not head-on).
- Bounce It: Use a white foam board to reflect light onto dark areas. Golden Rule: Soft, even light = happy customers.