Imagine never worrying about harsh sunlight, sudden rain, or distracting crowds during a shoot. That’s the magic of a photography studio. Whether you are taking portraits, products, or creative projects, a photography studio gives you controlled lighting. It also provides a professional space and a polished look that shows credibility. For clients, stepping into a well-designed studio signals you’re serious about your craft—no more negotiating coffee shop corners or backyard setups.
But here’s the kicker: studios aren’t just about convenience. They’re a powerhouse for consistency, creativity, and client satisfaction. Let’s break down why investing in a professional photography space beats the unpredictability of outdoor shoots—and how it can elevate your brand from “good enough” to “can’t miss.”
What Is a Photography Studio?
A photography studio is a purpose-built space designed to give photographers full control over every element of a shoot—from lighting and backdrops to acoustics and ambiance. Think of it as your creative playground, where you’re free to experiment without battling the elements or onlookers.
Key Benefits of a Photography Studio
- Lighting Mastery: Say goodbye to squinting clients or uneven shadows. Studios let you manipulate light with precision, whether you’re going for soft, ethereal vibes or bold, dramatic contrasts.
- Professional Appeal: A sleek studio space instantly boosts your credibility. Clients associate dedicated studios with expertise, which can justify higher rates and attract serious buyers.
- Year-Round Reliability: Rain or shine, your schedule stays intact. No more rescheduling weddings because of a storm or fighting golden-hour crowds at sunset.
- Creative Flexibility: Swap backdrops in seconds, test new props, or design intricate sets—studios are built for experimentation.
Still debating studio vs. outdoor photography? While outdoor shoots have their charm (natural light! authentic settings!), studios offer unmatched consistency—a must for commercial work or clients who demand perfection.
Why a Well-Optimized Studio Matters: Creativity, Clients, and Cash Flow
A studio isn’t just four walls and a strobe light. When optimized, it becomes the engine of your creative and financial growth. Here’s how:
Supercharge Your Creativity (and Workflow)
Ever tried editing photos from five different outdoor locations in one day? The color grading alone is a nightmare. Studios streamline your process:
- Consistent Conditions: Shoot in the same lighting setup every time, slashing editing hours.
- Efficiency: Keep gear organized and accessible—no more lugging equipment across town.
- Experimentation: Test bold ideas risk-free. Want to try a water splash shot or a smoke effect? A studio contains the chaos.
Elevate the Client Experience
Clients don’t just buy photos—they buy an experience. A professional photography space makes them feel valued:
- Comfort Matters: Offer amenities like seating, mirrors, or even a coffee bar. Happy clients = repeat bookings.
- Behind-the-Scenes Wow Factor: A stylish studio is Instagram gold. Clients love tagging your space, turning their session into free marketing.
Grow Your Business (Without the Guesswork)
A studio isn’t an expense—it’s an investment. Here’s why:
- Premium Pricing: Studios let you position yourself as a high-end pro. Charge more for the polished results only controlled environments can deliver.
- Diverse Revenue Streams: Rent your studio to other creatives during downtime or host workshops. It’s a side hustle that pays for itself.
- Brand Identity: A cohesive studio design reinforces your brand, making you memorable in a crowded market.
Ready to Build Your Dream Studio?
From mastering lighting setups to impressing clients on arrival, a photography studio isn’t just a workspace—it’s your secret weapon for standing out. Whether you’re converting a garage or leasing a downtown loft, the right studio transforms “good shots” into unforgettable art.
How to Set Up a Photography Studio: A Step-by-Step Guide
Your studio’s location can make or break your workflow—and your sanity. Let’s cut through the noise and find the best location for a photography studio that fits your budget and style.
Size Matters (But Not How You Think)
- Small Studios: Perfect for portraits, headshots, or product photography. A 200–400 sq. ft. space (like a spare room or garage) works if you’re tight on cash.
- Large Studios: Ideal for fashion, group shots, or dynamic sets. Aim for 600+ sq. ft. if you plan to build elaborate backdrops or host clients regularly.
Natural Light vs. Controlled Lighting
- Natural Light Lovers: Seek spaces with large north-facing windows (soft, diffused light). Great for maternity or lifestyle shoots.
- Control Freaks: Prefer windowless rooms? You’ll rely on artificial lighting, which is more consistent for commercial or studio-specific work.
Rental Studio vs. inhome photography Studio: The Ultimate Showdown
- Rental Studio Pros: Pre-built infrastructure, professional appeal, no home distractions. Ideal for: Full-time pros or those targeting high-end clients.
- Home Studio Pros: Save $$$, 24/7 access, tax deductions. Ideal for: Side hustlers or photographers testing the studio waters.
Pro Tip:
If converting a garage or basement into a photography home studio, check local zoning laws and soundproof walls to avoid neighborly drama.
Essential Photography Studio Equipment: Gear That Pays for Itself
No fluff, no overspending—here’s your must-have studio equipment checklist to nail professional results without going broke.
Cameras & Lenses: Your Studio’s Dynamic Duo
- Camera Bodies: Full-frame DSLRs or mirrorless cameras (e.g., Canon EOS R6, Sony A7 IV) for crisp, high-resolution shots.
- Lenses:
- Portraits: 50mm or 85mm prime lenses (buttery bokeh).
- Product Shots: 24–70mm zoom lenses (versatility for detail and wide angles).
- Tripods: Invest in a sturdy model with a weight hook (like Manfrotto MT190X) to avoid wobbles during long exposures.
Lighting & Studio Accessories: Shape Your Light, Own Your Vibe
- Lighting Kits: Start with a 2–3 light setup:
- Strobes: Godox AD200 Pro (powerful and portable).
- Softboxes: Glow ParaPop Collapsible (quick setup, soft light).
- Reflectors: Neewer 5-in-1 kit (budget-friendly bounce solutions).
- Backdrops & Props:
- Backdrops: Seamless paper rolls (neutral whites/greys) or muslin cloths for texture.
- Props: Chairs, stools, or vintage decor to add personality (check thrift stores for steals).
Editing Tools & Software: From Shoot to Polish
- Computer Hardware: A mid-range MacBook Pro or Windows PC with 16GB RAM and a color-accurate monitor (BenQ PD2700U).
- Software:
- Editing: Adobe Lightroom Classic (batch editing) + Photoshop (advanced retouching).
- Workflow: Capture One (tethered shooting) or Daminion (asset organization).
Budget-Friendly Studio Gear Hacks:
- Use clamp lights from hardware stores as DIY continuous lighting.
- Paint a wall matte white/grey for a permanent backdrop.
- Rent high-end lenses or lighting until you’re ready to buy.
Whether you’re converting a cozy corner of your apartment or leasing a downtown loft, the right setup balances practicality and creativity. Start small, prioritize budget-friendly studio gear that aligns with your niche, and scale as your business grows.
Setting Up the Perfect Studio Environment: Layout, Flow, and Vibe
A cluttered studio kills creativity. Let’s transform your space into a productivity powerhouse—without sacrificing style.
Creating an Efficient Work Area
- Zone It Out: Divide your studio into three zones:
- Shooting Area: Dedicate 60% of space to your main setup (backdrop, lighting, props).
- Editing Station: Keep your computer, hard drives, and cables away from the action to avoid distractions.
- Client Lounge: A small seating area with a mirror, refreshments, and portfolio samples makes clients feel welcome.
- Ergonomics Are Everything:
- Use adjustable-height desks for editing.
- Store gear on rolling carts (IKEA RÅSKOG is a cult favorite) for quick access.
Pro Tip: Paint walls matte white or gray to minimize light bounce and keep the focus on your subject.
Space Optimization Hacks
- Vertical Storage: Install wall-mounted shelves for lenses, memory cards, and small props.
- Foldable Furniture: Use collapsible tables/chairs for easy reconfiguration.
- Cable Management: Clip cords to walls or use floor mats to prevent tripping hazards.
Lighting Mastery for Studio Photography: Control Your Light, Own Your Shots
Lighting is the soul of studio photography. Nail these studio lighting techniques to turn “meh” into magic.
Techniques for Consistent Lighting:
- Use a Light Meter: Stop eyeballing exposure—measure it for repeatable results.
- Flag It: Block stray light with black foam boards ($10 at craft stores).
- Test, Test, Test: Shoot a few frames before the client arrives to tweak angles and intensity.
Natural vs. Artificial Lighting:
- Natural Light: Soft and forgiving, but unpredictable. Perfect for lifestyle or boudoir shoots. Use sheer curtains to diffuse harsh sunlight.
- Artificial Light: Total control for commercial or product work. Start with a basic 3-point setup (key, fill, backlight) and expand as needed.
Types of Lighting Gear and Setups
- Softboxes: Create flattering, even light (ideal for portraits and beauty shots).
- Ring Lights: Perfect for flatlay product photos or influencer-style video content.
- Strobes: Use these powerful flashes for freezing motion (e.g., splash shots or dancing).
Classic Lighting Patterns:
- Rembrandt Lighting: Position the key light at 45 degrees to create a triangle of light under the eye—dramatic and timeless.
- Butterfly Lighting: Place the light directly in front and above the subject for soft, glamorous shadows (hello, cheekbones!).
Keyword-Friendly Takeaway: Learning how to set up studio lighting isn’t just technical—it’s how you sculpt mood and story.
Backdrops and Props: Craft Scenes That Wow (Without the Budget)
Backdrop Materials: Pick Your Canvas
- Seamless Paper Rolls: Cheap, disposable, and classic. White/gray for clean looks, bold colors for pop. (Best for: Portraits, product shots).
- Muslin Cloth: Wrinkle-resistant and reusable. Go for textured options like burlap or canvas for organic vibes.
- Vinyl Backdrops: Spill-proof and durable. Great for food photography or messy creative projects.
Pro Tip: The best backdrops for studio photography are neutral—they let your subject shine without competing for attention.
Creative Photography Props: Thrift, DIY, Repeat
- Thrift Store Gold: Vintage chairs, mismatched teacups, or retro lamps add character for 5–5–20.
- DIY Magic:
- Spray-paint dollar-store vases metallic for luxe product staging.
- Hang fairy lights behind sheer fabric for a dreamy bokeh effect.
- Use PVC pipes to build lightweight prop stands (paint them black to blend in).
- Niche-Specific Props:
- Newborn Photos: Knit blankets, faux fur rugs.
- Branding Shoots: Mock laptops, stylish notebooks, succulents.
Budget Bonus: Swap props with local photographers to keep your sets fresh without spending a dime.
Whether you’re mastering studio lighting techniques or thrifting props that tell a story, every detail shapes your brand. Start with the basics, experiment wildly, and remember: the best studios evolve with their creators.
Optimizing Your Studio Workflow: Work Smarter, Not Harder
A cluttered studio wastes time and kills creativity. Here’s how to build an efficient photography workspace that lets you focus on what matters: shooting.
Storage Solutions That Actually Work
- Go Vertical: Install wall-mounted pegboards or shelves for lenses, memory cards, and small props.
- Label Everything: Use clear bins with bold labels (“Batteries,” “Light Modifiers”) to end the “where’s my sync cable?!” panic.
- Rolling Carts: IKEA’s RÅSKOG trolley holds backdrops, stands, and cords—wheel it anywhere in seconds.
Cable Management: No More Tripping Over Cords
- Sleeve It: Bundle cables with spiral wraps or fabric sleeves.
- Floor Tape: Use gaffer tape to secure cords to the floor (no residue, no fuss).
- Power Stations: Set up a surge protector with USB ports near your shooting area for easy access.
Ergonomics: Protect Your Body (and Sanity)
- Adjustable Desk: Alternate between sitting and standing while editing.
- Anti-Fatigue Mat: Stand comfortably during long shoots.
- Lighting Arms: Mount monitors or reference screens at eye level to avoid neck strain.
Pro Tip: Dedicate 10 minutes post-shoot to reset your space. Future-you will high-five present-you.
Client Management in a Studio Setting
Your studio client experience can turn one-time clients into raving fans. Here’s how to nail it:
Booking Systems That Save Time (and Headaches)
- Automate Scheduling: Use tools like Calendly or HoneyBook to let clients book slots online—no back-and-forth texts.
- Pre-Shoot Consultations: Send a quick Google Form to ask about wardrobe preferences, allergies (for product shoots), or vibe goals.
Create a Welcoming Atmosphere
- First Impressions: Greet clients with a branded sign, fresh coffee, or calming playlist.
- Mirror Check: Install a full-length mirror so clients can adjust hair/makeup pre-shoot.
- Behind-the-Scenes Sneak Peeks: Snap phone pics during the session and AirDrop them instantly—clients love instant gratification.
Post-Shoot Magic
- Follow-Up Fast: Send a “thank you” email within 24 hours with a delivery timeline.
- Share a Teaser: Drop one edited photo on social media and tag your client—free marketing + ego boost.
Time-Saving Editing Workflows
Software Recommendations
- Lightroom Classic: Batch edit 100+ photos in minutes with presets.
- Photoshop: Use Actions for repetitive tasks (e.g., skin retouching, background swaps).
- Capture One: Shoot tethered to review images on a big screen as you click.
Batch-Editing Hacks
- Presets Are King: Create custom presets for your go-to styles (e.g., “Bright & Airy Portraits,” “Moody Product Shots”).
- Cull Ruthlessly: Delete blurry/duplicate shots before editing—no mercy.
- Outsource the Grind: Use platforms like Fiverr for time-sucks (e.g., masking, color correction).
File Organization
- Folder Structure:
- Raw Files > YYYY-MM-DD_ClientName
- Edits > Selects > Finals
- Naming Conventions: “Smith_Wedding_Selects_01.jpg” beats “IMG_4572.jpg.”
Pro Tip: Edit in sessions (e.g., cull Monday AM, color grade PM) to stay in “flow state.”
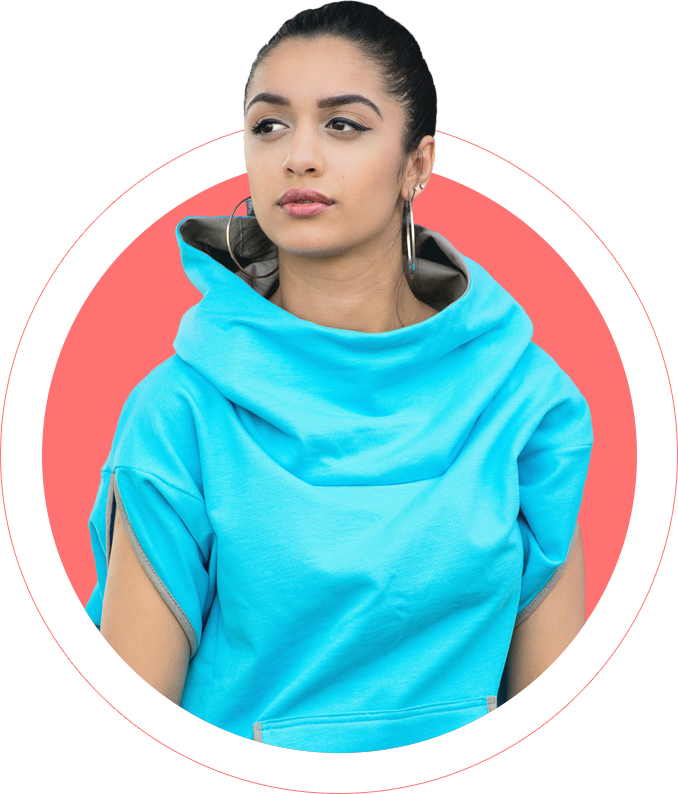
Portrait Photography in a Studio
Studio portraits are more than just headshots—they’re a chance to freeze a moment of someone’s essence. Here’s how to nail studio portrait tips that make clients gasp (in a good way).
Posing Guides: Flatter, Don’t Flatten
- Individuals:
- Chin Forward, Down Slightly: Avoid double chins without making it obvious.
- Weight on Back Foot: Creates natural, relaxed posture.
- Hands in Motion: Ask them to adjust a cufflink or touch their collar to avoid “dead fish hands.”
- Families:
- Layer Heights: Seat parents, have kids stand behind or lean in.
- Connect Touchpoints: Hands on shoulders, linked pinkies—tiny touches build warmth.
Lighting for Skin Tones: Glow, Don’t Ghost
- Fair Skin: Use soft, diffused light to avoid washed-out highlights. Add a gold reflector for warmth.
- Deep Skin Tones: Boost contrast with harder light (gridded softboxes) and magenta gels to neutralize yellow undertones.
- Universal Trick: Place a reflector at waist level to bounce light under the eyes and soften shadows.
Pro Tip: For professional portrait lighting, start with a simple loop lighting setup (key light at 45 degrees) and tweak from there.
Product Photography Studio Hacks: Make Cheap Stuff Look Like a Million Bucks
Whether you’re shooting for Amazon or a boutique brand, these product photography studio setup secrets turn “meh” into “must-buy.”
Lighting Setups for E-Commerce
- The Classic: Two softboxes at 45 degrees + a white foam board fill. Crisp, shadow-free results (Amazon’s favorite).
- Drama Mode: Single backlight + black card sides for moody, high-end vibes (think luxury watches).
Taming Reflective Surfaces
- Matte Spray: Temporarily dull shiny metals/glass (use a light coat!).
- Black Tent Trick: Shoot reflective items inside a black fabric tent to control reflections.
Miniature Staging: Small Products, Big Impact
- Fake Depth: Place tiny products on a downward-sloping acrylic sheet to fake a “hero angle.”
- Forced Perspective: Use faux grass, mini furniture, or scaled-down props to create whimsical scenes.
Amazon Product Photo Tips:
- Use pure white backdrops (RGB 255,255,255) for compliance.
- Shoot multiple angles (front, back, detail) in the same lighting to maintain consistency.
Experimental Styles: Fine Art, Composite Magic, and Beyond
Break the rules. Burn the rulebook. These creative studio photography ideas turn your studio into a wonderland.
Fine Art Techniques
- Double Exposures: Shoot a portrait, then overlay textures (crinkled paper, fire) in-camera or via Photoshop.
- Prop Stories: Use symbolic items (clocks for time, broken mirrors for fragility) to add narrative depth.
Composite Photography Tutorial: Layer Like a Pro
- Shoot Your Base: Pose your subject against a solid-colored backdrop.
- Capture Elements: Phototypextures (smoke, water splashes) separately.
- Blend in Photoshop: Use layer masks and blending modes (try “Screen” for fire/light effects).
Budget-Friendly Tools:
- Free textures from Unsplash or TextureKing.
- DIY smoke bombs (outdoors, please!) for ethereal overlays.
Final Takeaway: Your Studio, Your Playground
Whether you’re mastering professional portrait lighting or staging miniature unicorn tea parties for product shots, creativity thrives when you experiment. Push boundaries, fail gloriously, and remember: the best artists steal.