In the beauty industry, the right cosmetic product photography can help tell your brand’s story and drive more sales. Good product images are a way to get people’s attention. They also help your customers feel close to your brand. Let’s explore how to do beauty product photography
Essential Preparation for Beauty Product Photography
Achieving great results in cosmetic photography begins before you even take out the camera. Getting ready is important. Professional photographers with years of experience say it is a must. It makes you save time when you do the shoot. It also reduces the amount of post-production work required for your images.
When you prepare your beauty product, you have time to make sure every part looks good and neat. This helps you capture clean and visually appealing product shots that showcase the best results.
Here are steps you can use to clean items and smooth surfaces, so your beauty product looks perfect in your product shots.
Cleaning and Prepping Cosmetic Items
The first step in beauty product photography is to ensure that each product is clean and free from debris. The camera can capture every speck of dust, every mark, and any fingerprint. These small details can detract from the overall look and feel of the product. So clean before shoots.
Start with a simple way for skincare product photography and other cosmetic items. This will help your products look their best.
- Wipe the product with a damp cloth to remove any visible dirt on the surface.
- Use compressed air to blow out any dust that gets stuck in small spaces.
- Wear soft, white gloves when handling the products to prevent leaving fingerprints.
In cosmetic product photography, paying attention to these details is crucial. It helps your pictures stand out from regular ones.
Polishing Packaging Surfaces
After completing the first cleaning, it is essential to polish the product. This is true for any item that has a shiny or reflective surface. In cosmetic photography, packaging often uses glossy plastic, glass, or metal. These materials will reflect anything near them.
To get the best results, take your time and polish every part of the surface until it shines. A dry microfiber cloth works well for this. It can remove smudges without leaving any lint behind. It also reduces time on retouching. This step is important in cosmetic photography.
Choosing the Right Equipment to do Beauty Product Photography
While your skill is important, the right tools can significantly enhance your beauty product photography. You need a good camera and the right lens to capture sharp pictures and showcase the textures that make a beauty product stand out.
Investing in a few key pieces of equipment will help you consistently produce professional product shots. Let’s take a look at which cameras and lenses work best for showcasing great detail, and review the accessories.
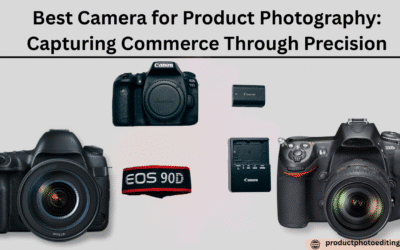
Camera and Lens Recommendations
For high-quality makeup photography, a DSLR camera that allows for manual adjustments is highly recommended. This control is essential for achieving the perfect exposure and focus in your product images.
A macro lens is the best for capturing the fine details of cosmetics. Lenses like a 60mm macro are perfect for getting crisp shots of product textures and packaging. For images featuring models or swatches, a 50mm or 85mm lens is ideal for creating a flattering perspective.
To get started, here are some ideal camera settings for your shoot. These settings provide a solid baseline for capturing sharp, well-lit photos.
| Setting | Recommendation | Why It Works |
| ISO | 100-200 | Minimizes grain and ensures the cleanest image. |
| Aperture | f/11 – f/18 | Creates a large depth of field, keeping the entire product in sharp focus. |
| Shutter Speed | 1/125s | Prevents motion blur, especially when using a tripod. |
| Format | RAW | Captures the most data, allowing for greater flexibility in post-production. |
Must-Have Accessories for Studio or Home Shoots
To achieve the best results in makeup photography, you will need additional equipment. These tools help you control the space, maintain a consistent setup, and refine your lighting setup. They can help you take product photos that look professional.
Here are those:
- Tripod: A tripod helps keep the camera in one spot for a whole series of images. This keeps the camera steady.
- Lighting Modifiers: Items such as diffusers, reflectors, and softboxes are important. They shape and soften your light source. It manages shadows and any bright reflections.
- Remote Shutter/Control: Use a remote shutter release or control for your camera. This avoids shaking the camera when you press the shutter by hand.
With these tools, you will be ready to take makeup photography to a new level and achieve high-quality results in all your product photos.
Mastering Lighting Techniques
Lighting is very important in beauty product photography. A good lighting setup helps the product look better and high-end. But bad lighting might make it look dull or less attractive. You need to use your light source to highlight the texture and shape of your photograph and eliminate harsh shadows.
You need to know how to work with light to achieve the best results. Here, we talk about which tools make a light softer. We also examine the benefits of both natural and artificial lighting when conducting product photography.
Using Softboxes, Beauty Dishes, and Diffusers
To prevent strong and sharp light from appearing in beauty product photography, you need to soften the light source. Items such as softboxes, beauty dishes, and diffusers will help with this. They spread out the light, so it wraps around the beauty product in a nice and smooth way.
A beauty dish is a special tool for your lighting setup. It gives your product shots a different look. The light is soft but still has some strong contrast along the edges. It works well for both portraits and product photography.
Here are some key modifiers to think about for your product shots and overall lighting setup:
- Softboxes: The light source is enclosed inside a box, and the front is lined with soft material. This gives you a very even and soft light.
- Diffusers or Scrims: Put this thin material between your light source and your beauty product. It will soften and spread out the light, making it less harsh in your product photography.
- Beauty Dishes: This tool makes your light look focused yet soft. The light coming from it is a bit stronger than that of a softbox, but not as harsh as direct light.
Playing with Natural Versus Artificial Light
Choosing between natural light and other lighting options for your beauty product depends on what you want and what you have available.
Natural light coming from a big window is free and works well. It provides a soft, smooth appearance that avoids harsh shadows. This is ideal for showcasing your beauty product in the best light. However, it can change rapidly, making it challenging to maintain the same lighting consistently. Therefore, you need to be quick during your shoot to maintain evenness.
Artificial light lets you control everything. Studio lights help you achieve a consistent look across a series of images, regardless of the time of day. You will need more tools and learn some basics, but it’s beneficial when you want a consistent style for all your photos.
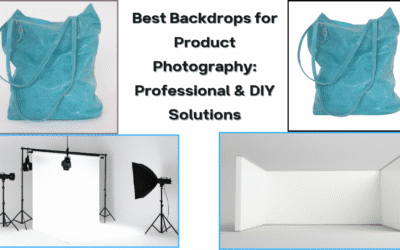
Best Backgrounds for Standout Cosmetic Shots
The background you pick is important for your product images. It should match the beauty product and not take attention away from it. On many e-commerce sites, the rule is to use a white background. This gives a clear and neat look for product shots, with no distractions.
Still, you can use creative backgrounds to show your brand’s story or set a mood. The color, material, or texture you choose can help your product stand out.
Let’s see how you can find the best backdrop to make your cosmetics pop in product shots.
Selecting Colors and Materials to Complement Products
The color and material you use for your backdrop can significantly impact how people perceive your product images. A white background is a simple way to give your product photos a clean look. You can also try other colors to match your brand’s style. Many beauty brands choose colors from their logos and websites.
If you use a smooth backdrop, such as acrylic sheets, you can achieve cool reflections that look nice in your product images. Using something like canvas or linen can make your photos feel soft and warm.
Here are a few ideas for your next photoshoot:
- Cool Tones: Use a light blue background to make the product seem fresh and clean. This works well for skincare items such as soaps or face washes.
- Warm Tones: Desert sage or sandy colors add an earthy and natural touch to your images.
- Playful Hues: Bright shades, such as millennial pink, are ideal for beauty brands seeking a young and fun aesthetic.
Creative Arrangements and Styling Ideas
In the beauty industry, looks matter a lot. Creative setups and styles help attract people’s attention, especially on social media. How you place your products and the items around them can tell a story, evoke a feeling, and make your product shots stand out.
Smart styling lets customers see the product as being a part of their life. You can use simple flat lays or rich lifestyle scenes. Here are some ideas to help you create effective scenes and utilize props effectively.
Composing Flat Lays and Lifestyle Scenes
Flatlays and lifestyle scenes are effective ways to showcase a beauty product. It works well when you want to put your product with other things that look good together.
Lifestyle scenes are more effective when the product is placed in a realistic setting. For example, you can put a moisturizer on a bathroom counter next to a towel and a plant. This gives people a clear idea of the product in use.
When you set up these photos, use these tips:
- Rule of Thirds: Avoid placing your main product directly in the center. Place it a bit off to the side to make the photo look better and more eye-catching for social media.
- Odd Numbers: Try to group things in sets of odd numbers, such as three or five. These groups often look nicer than even-numbered ones.
- Negative Space: Leave some empty space in your photo. This empty space can be a good spot for you to add text for your social media or ads later.
Incorporating Props That Enhance Beauty Products
When using props, ensure they enhance the beauty product, not detract from it. The best results come when props tell your brand’s story, point out what is in the product, or set the right mood.
For the best results, select props that complement the product and look visually appealing alongside it. So, if you have a product with pomegranate in it, use a fresh pomegranate in your product shots. That will give people info and make it look nice.
Composition Tips to Guide Viewer Attention
Great composition is not just putting a beauty product in the frame. It is about guiding the viewer’s eye on purpose. Ideas like using the rule of thirds, leading lines, and good framing help make product photos more interesting. They hold attention and show what is most important.
Framing and Angles for Dynamic Images
The angles and framing you use can really change how people see a beauty product. You do not have to always take product shots head-on. Try shooting from different sides or heights. These ways can help your product photos look more lively and interesting. For example, if you shoot a beauty product from a low angle, it can seem bigger and more special.
There are some simple compositional rules you can follow.
Here are a few techniques you can use:
- Rule of Thirds: Picture a grid with three rows and three columns on your image. Put your beauty product along the lines or where the lines cross for a nice, balanced look that is not right in the middle.
- Leading Lines: You can create lines with props or shadows in your product shots. These lines will pull people’s eyes straight to your product.
- Framing: In your product photos, use objects in the front or back to make a frame around your beauty product. This brings all the focus where you want it.
Shooting Techniques for Different Types of Cosmetics
Not every product works the same way in pictures, so the way you take photos should change, too. Matte powders and glossy lipsticks are two examples. They reflect light differently. There is no single way that works best for all skincare product photography or makeup pictures not for others.
If you want to make a good series of images, you should change your shooting style for different products. The next sections will provide you with simple tips for different types. You will find ways to make your product photography look better for each one.
Makeup, Skincare, and Haircare Product Strategies
Successfully photographing different products like makeup, skincare, and haircare items requires specific strategies tailored to their surfaces. Matte objects are the easiest to shoot, while glossy and reflective items demand careful light management to control reflections. Always take a few test shots to perfect your setup before starting.
Here is a quick guide for tackling different product surfaces:
| Product Surface | Strategy | Key Consideration |
| Matte Objects | Use a single, direct light source. | Focus on shaping the light to correctly render the product’s texture and form without reflections. |
| Glossy Objects | Use soft, diffused light from softboxes or diffusers. | Watch reflections carefully. Wear gloves to prevent fingerprints and check the surface before each shot. |
| Reflective Objects | Direct light onto a white diffuser or reflector, not the product itself. | This is the most complex type. It requires creating a controlled environment to manage what is reflected in the product. |
Close-ups, Action Shots, and Group Layouts
To help online shoppers see everything about your products, it is beneficial to display a series of images. Use different types of shots to give them a clear idea of the texture, how to use it, and its size. This kind of variety helps people feel confident about making a purchase.
Macro shots, like close-ups, would be great for showcasing the unique look of a powder. Also, the shine in some eyeshadow or the smooth texture of a lotion. Use action shots to show things on lipstick swatches, powder being brushed on, or mist coming from a fragrance.
Group shots, where you put a few products from the same line together, can make people want to buy more and show off all you offer.
Editing Beauty Product Photos for Maximum Impact
Post-production is the last and very important step when making eye-catching beauty product photos. Even if you get ready well and take good shots, you still need to edit the photos to look better. Editing includes tasks such as retouching, removing imperfections, and adjusting colors to ensure they appear accurate.
When you edit, your main goal is to make the beauty product stand out. You can’t change it so much that it no longer resembles itself. Making small adjustments to shadows and highlights helps reveal more detail and gives the product photos a more polished look.
Retouching, Blemish Removal, and Color Correction
The first step in editing is to tidy up your product images. At this point, you look for and address any areas or marks that were not detected previously. It is essential to remove dust, scratches, or scuffs.
Color correction also plays a big part for beauty brands. The colors displayed in your product images must match the actual product. This helps make sure your customers know what to expect. If the colors are off, people might return products. Salsify found that 40% of buyers send things back when what they get looks different from the pictures.
Here are the key editing steps to focus on:
- Spot Removal: Use good tools to remove any dust, marks, or spots you see on the product or background.
- Color Matching: Fix the color in the product images so each shade matches what you see in person.
- Exposure Adjustments: Make small adjustments to the brightness or darkness of the image. Be careful not to make the photo too bright or lose important details.
Adding Shadows, Highlights, and Product Details
After completing the basic cleanup, you can enhance your product photos by refining the shadows and highlights. This step is called dodging and burning. It helps your image feel more real. The product looks more solid and easier to see.
When you brighten the highlights and make the shadows darker, you bring out small details. This also helps the viewer know what to look at first. It is important to do this in a soft way. Keep the lighting looking natural and avoid making the image appear fake.
Avoiding Common Beauty Product Photography Mistakes
Even when you try your best, there are some mistakes that you can make when taking photos of a beauty product. Things like excessive reflection or inconsistent styling in every photo can detract from the overall appearance of your pictures.
It helps to be aware of these problems early, so you don’t fall into these traps. In the next parts, you will see tips that help you deal with glares and reflections.
Managing Reflections and Glares
Managing reflections and glare is one of the biggest challenges in Beauty product photography. Too many reflections can take attention away from the product and make your pictures look unprofessional.
The top tip is to use soft, diffused light. Hard, direct light can make bright spots and sharp reflections, but soft light makes smoother highlights that look more pleasing. You should also move your light source and camera around to see how the reflections change.
Here are some common ways to control reflections:
- Use a Diffuser: Put a large diffuser or a scrim between the light source and the product. This will help make the light softer.
- Change Your Angle: Try adjusting where your camera or your light source is. This small change can help get rid of unwanted glare.
- Block Reflections: Place black or white cards (also called flags) just out of the shot. Use these to stop or take in extra light and manage what gets reflected in the product.
Conclusion
Learning product photography for beauty products takes planning and some creative ideas. It is good to clean and get your products ready first. After that, pick the right camera and tools to use. Try out different lights to see what makes your beauty product look best.
If you want your product photography to get even better, you can book a free talk with our team. We are here to help you start taking great photos of your beauty product and to answer any questions you have.