In e-commerce, standing out is important. High-quality, edited product photos give a competitive edge. A BigCommerce study shows that 78% of online shoppers prefer images. Amazon, which focuses on visuals, highlights the importance of product images. This article will guide you, step-by-step, on how to edit product photos for Amazon using Adobe Photoshop.
Essential Guidelines to Edit Product Photos for Amazon
Here are Amazon’s key requirements for product images:
- Acceptable image formats include .tif/.tiff, jpeg/jpg, .gif, or .png.
- Images must have pixel dimensions of at least 1000 pixels in either height or width, with a recommendation of 2560 pixels wide.
- Color mode should be converted from CMYK to sRGB, and the background must be white.
- The image should fill 85% of the frame.
- File names must include the product identifier (your Amazon ASIN, JAN, EAN, ISBN, or 13-digit UPC). Then, add a period and the appropriate file extension (as listed above). For example, 1234567890.tif or B9876543210.jpg. Avoid using dashes, spaces, or special characters in the file name.
- Design restrictions: Images must not contain text, borders, logos, mannequins, or watermarks. If your image has a mannequin, consider editing it out. Or, use our eCommerce photo editing services for complete product photo editing.
Detailed Guide on How to edit product photos for Amazon
Step 1: Open Your Image in Photoshop
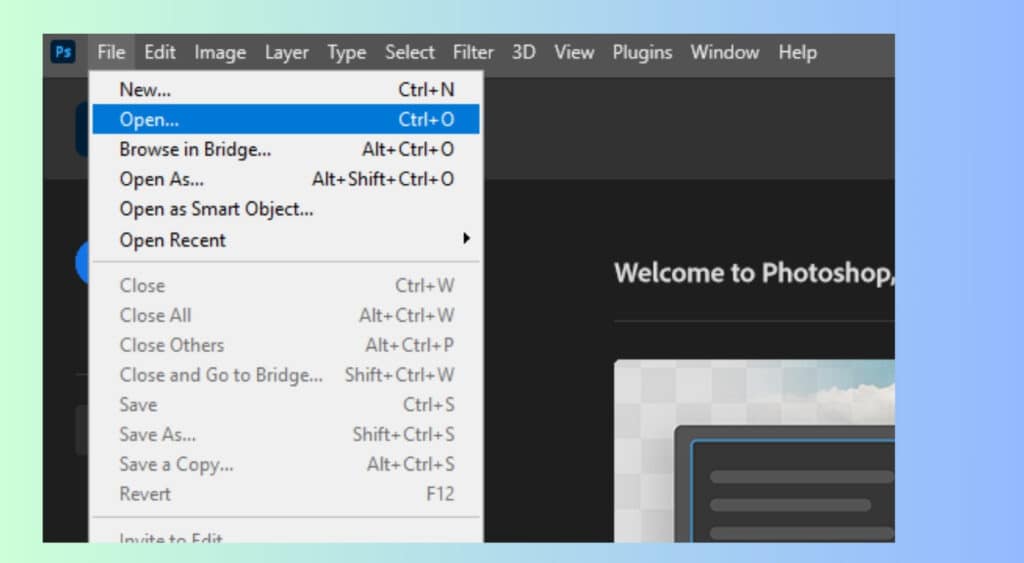
Launch Photoshop and import your product image by navigating to File > Open, then selecting the desired file from your computer. This will allow you to access the image editing features.
Step 2: Crop Your Image
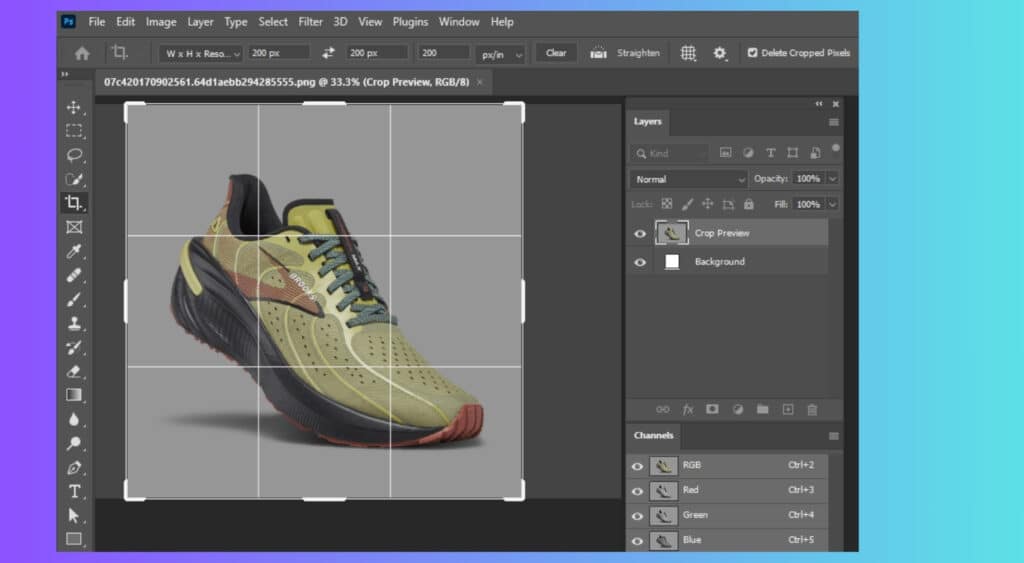
Cropping is a necessary step in refining your product photo. It involves cropping unwanted outer areas to focus attention on the product itself. To crop, select the Crop Tool from the toolbar or press the ‘C’ key on your keyboard. Ensure your product occupies at least 85% of the image, as specified by Amazon’s guidelines. Remember to maintain the original aspect ratio to preserve the product’s proportions. If you’re selling a rectangular product, the cropped image must be rectangular.
Step 3: Adjust the Lighting
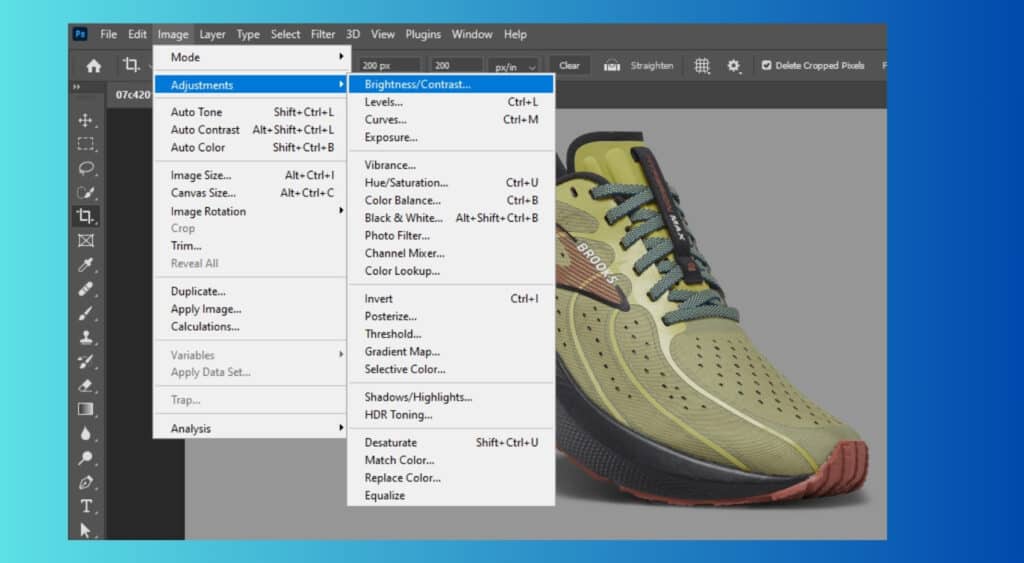
Lighting plays a critical role in making your product photo visually appealing. Poor lighting can cause unflattering shadows or overexposure. This harms the product’s appearance. To adjust the lighting, go to Image > Adjustments > Brightness/Contrast. Fine-tune the sliders to get the desired effect. If your photo has uneven lighting, use the Dodge and Burn tools to balance it. The Dodge Tool lightens areas in an image. The Burn Tool darkens them. This is like a photographer adjusting the lighting in a studio. For example, if your product has a sharp shadow on one side, you can use the Dodge Tool to lighten it.
Step 4: Remove the Background
Amazon requires a pure white background for the main product image to ensure consistency across its platform. To achieve this, follow these steps:
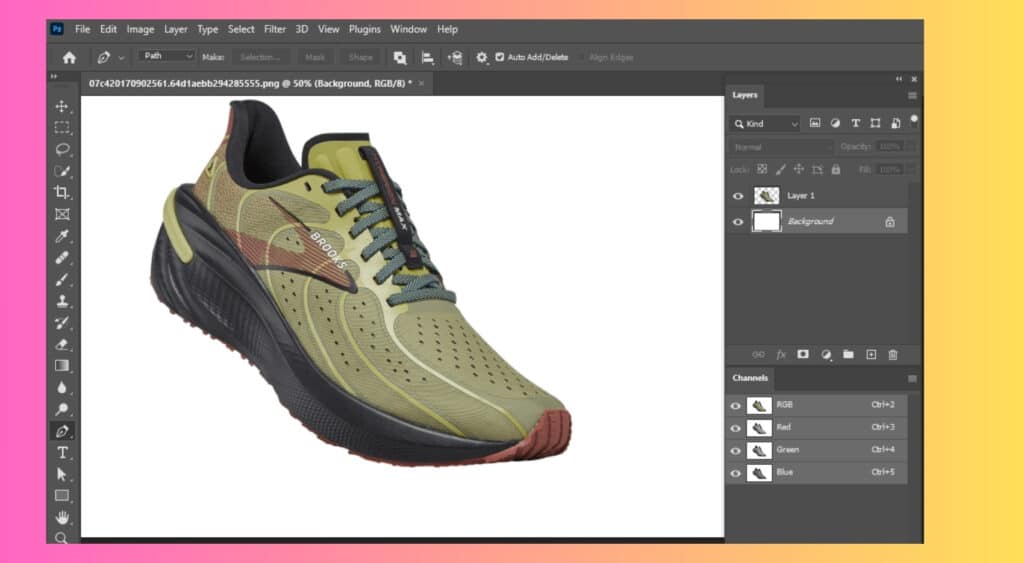
- Select the Magic Wand Tool (W) to automatically detect and select the background. Adjust the tolerance in the upper toolbar. It will select more or less of the same color, depending on the background’s complexity.
- After selecting the background, go to Edit > Fill. Choose White to replace the selected area with pure white.
- After this, deselect the area. Go to Select > Deselect (or press Ctrl+D). This prevents accidentally erasing parts of your product while editing. Be careful. Choosing the wrong area or tool can have obligatory results, like erasing key product features.
Step 5: Perfect Your Product Image with Retouching
Retouching is a crucial step in product photography that involves removing or fixing any imperfections in your image. These imperfections could be a scratch on your product, a dust particle, or a wrinkle in your product’s fabric. Think of retouching asdigitally dusting and polishing your image to make it look more appealing to potential customers.
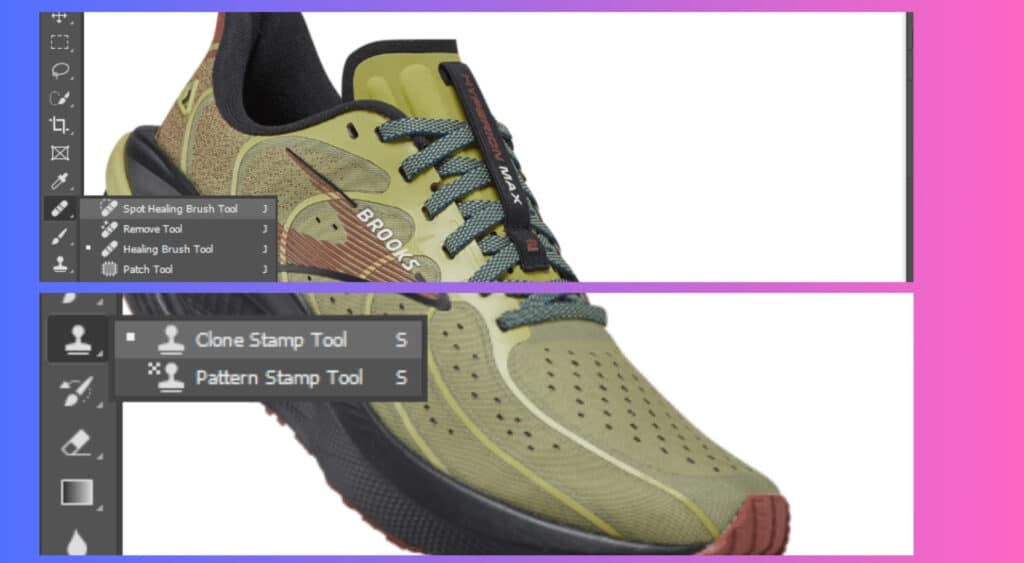
- For small blemishes, the Spot Healing Brush Tool (J) is your best friend. This tool is like a magic eraser for tiny imperfections. Simply click on the area you’d like to improve, and Photoshop will automatically blend the surrounding pixels to fix the blemish.
- For larger areas, use the Clone Stamp Tool (S). Hold down Alt to choose a source point, then paint over the area you want to fix. This tool is like a digital version of a painter’s brush, allowing you to seamlessly blend one part of the image with another.
Step 6: Enhance the Color to Make Your Product Pop
The Color Balance or Hue/Saturation tools can enhance your product photo’s colors. They can make it more vibrant and appealing to customers. They let you adjust the colors, saturation, and lightness to create a stunning effect.
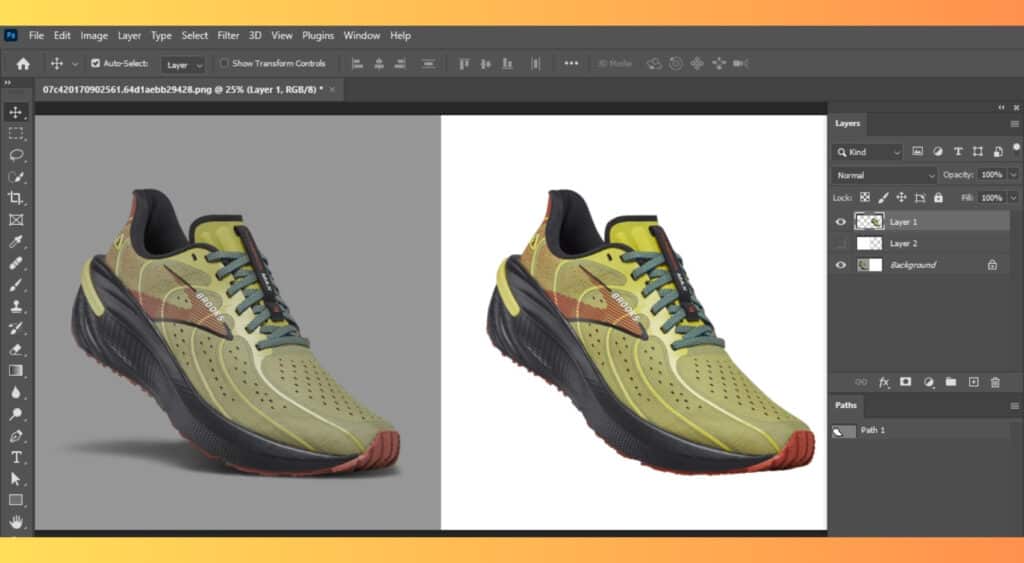
- To use Color Balance, go to Image > Adjustments > Color Balance (or press Ctrl+B). Here, you can adjust your image’s colors. This will create a more natural look that shows your product’s true colors.
- For Hue/Saturation, go to Image > Adjustments > Hue/Saturation (or press Ctrl+U). This allows you to adjust the colors, saturation, and lightness to create a more dramatic effect.
Remember, enhancing colors can make your product more appealing. But, it’s vital to keep them true to the actual product to maintain customer trust.
Step 7: Resize Your Image for Optimal Display
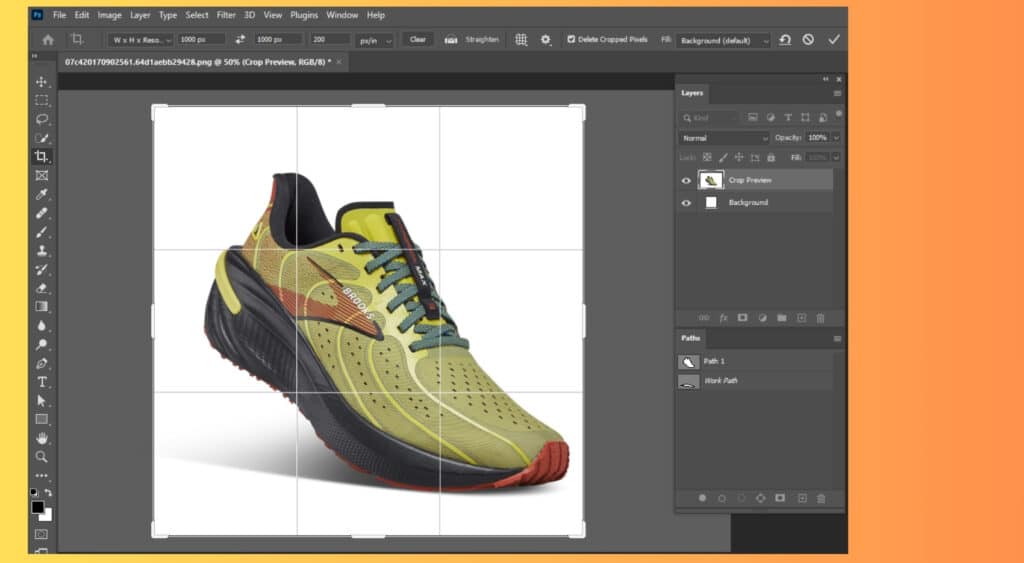
To resize your image, go to Image > Image Size and adjust the width or height to at least 1000 pixels. Check the ‘Constrain Proportions’ box to keep the aspect ratio. This will prevent your image from becoming distorted.
Step 8: Save Your Image in the Correct Format
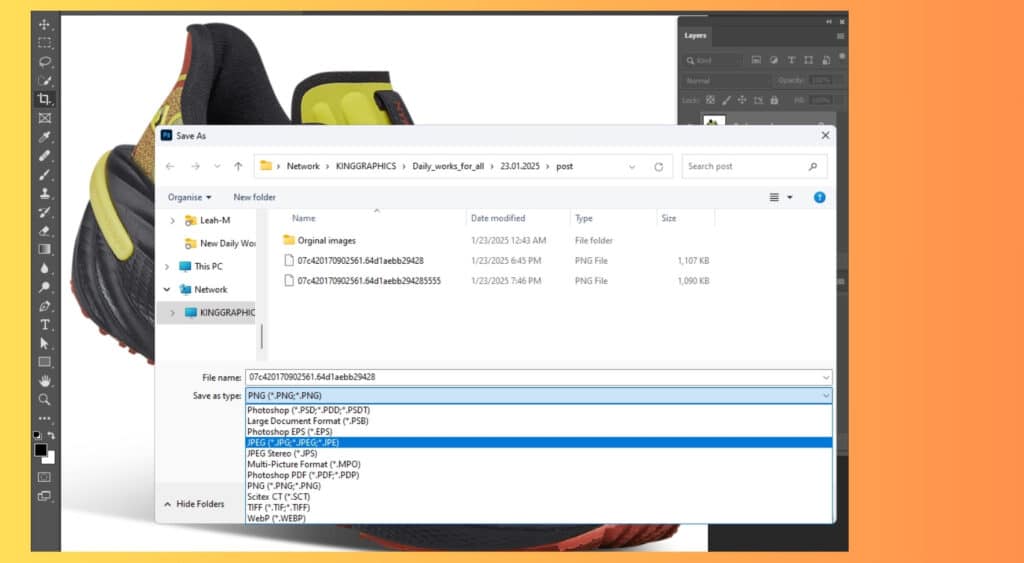
Finally, save your image in the correct format. Amazon accepts JPEG (.jpg), TIFF (.tif), or GIF (.gif) files. To save your image, go to File > Save As, select the format, and click Save. This is like putting the finishing touches on your product image, ensuring it’s ready for display on Amazon’s platform.
The Power of Well-Edited Images: How Visuals Drive Customer Engagement
By mastering image editing, you can create product photos that meet Amazon’s guidelines and attract your audience. The Nielsen Norman Group found that online shoppers spend 10% more time on product photos than descriptions. This shows the importance of quality images in sales. Today, good product photography is essential, not optional. Good image editing boosts customer experience, trust, and sales. An edited image raises your brand’s credibility and shows professionalism. This builds buyer confidence. Conversely, bad images turn customers away and harm your brand. As you improve your Photoshop skills, see each edit as a chance to enhance customer experience, build trust, and increase sales. Every retouched image not only looks better but also strengthens your connection with the audience. This effort sets your brand apart and leads to more loyal customers. Happy editing.
Conclusion
In summary, preparing your Amazon product photos is key for better sales. You can do it yourself or hire a pro. We suggest taking the photos yourself and then hiring an editor. This way, you keep copyright and ensure high quality. Always prioritize photo editing in your Amazon business. It’s crucial.
Does Amazon Require Photo Editing?
Online selling platforms like Amazon have friendly guidelines for uploading product images. These rules help create a uniform and consistent experience for all sellers. To keep things running smoothly, sellers need to follow certain standards, such as using the right image size, a white background, and proper margins. If these guidelines aren’t followed, sellers might face issues like being blocked or flagged. So, it’s important for all sellers to either edit their photos themselves or seek help from someone who can. This step is essential for anyone who wants to be part of the platform.
While it may seem straightforward, these guidelines can be tricky for those who aren’t skilled in editing software like Photoshop. Placing products on a white background requires a good eye for detail and some practice. Additionally, images need to be optimized, compressed, and resized to ensure that the page loads quickly. This can make a big difference in keeping customers engaged and happy.
How Can Amazon Photo Editing Boost My Business?
Photo editing and retouching are crucial for online sellers, especially on Amazon. With millions of buyers, your business must stand out. High-quality photos give you an advantage over competitors. Editing improves lighting and color, making products more appealing. When customers see great photos, they are more likely to appreciate and purchase your products.
At product photo editing, our friendly editors can help you add infographics to your images. Remember, the first thing customers notice is the product photo. Making sure this image includes key details can help customers quickly understand what you offer. Many prefer to glance at the important info instead of reading long descriptions.
We edit product photos for Amazon. We also offer 360-degree rendering for your Amazon listings. This technology can enhance your product images. It will fix flaws and showcase your items. also, we can create lifestyle shots that show your products in use, helping customers imagine how they would fit into their lives.
Why Should I Outsource My Amazon Photo Editing?
Not everyone has the capacity to take high-quality photographs of their products. Amazon is filled with small and medium-sized sellers. Therefore, outsourcing photo editing and rendering services is a good idea. You won’t always have daily editing needs, so there’s no need for you to hire in-house editors. Outsourcing will only cost you a fraction, but the returns to your business will be huge.
If you’re thinking that Amazon photo editing is not worth it, think again. Amazon and other giant online selling platforms can reach millions of online buyers. Don’t stress yourself over following the guidelines so you can enter the market. Leave it all to product photo editing-the experts at photo editing, retouching, and 360 degree rendering.
How much should you pay someone to edit Amazon photo editing?
There are many websites that offer free product photo editing online. Hiring for Amazon photo editing starts at about $0.39 per photo. Typically, companies charge between $0.50 and $2.00 for basic edits. These simple enhancements take about 3 to 10 minutes.
Our company offers photo editing starting at $0.39 per image. You can hire us by the hour or for the whole project. For top results in Amazon product photos, an experienced editor is key. We’re here to help you achieve the best outcome for your images.
Does Amazon have a photo editor?
Amazon doesn’t have a built-in photo editor. However, it offers great photo editing software. This includes Adobe Photoshop Elements 2022, Corel PaintShop Pro 2022 Ultimate, and Cyberlink PhotoDirector 13 Ultra.
To upload product photos to Amazon, follow their guidelines. Also, edit product photos for Amazon first. You can easily do this with various photo editing programs, such as GIMP or Photoshop CC. Some sellers even use the Amazon Seller Photo App for excellent results.
When selling on platforms like Amazon, it’s essential to meet their requirements for product images. This includes specific photograph sizes, a white background, and proper margins. These standards help ensure that all sellers maintain a consistent and professional appearance. Not following these rules could lead to your account being flagged or blocked, so it’s crucial for all sellers to edit their photos or hire someone to help.
While it may seem straightforward, these guidelines require some skill with photo editing. Products should be presented on a white background, which takes precision. Additionally, your images need to be optimized, compressed and resized. This will help your page load quickly, reducing the chances of losing customers due to slow-loading images. Following these steps will help you succeed on the platform.

